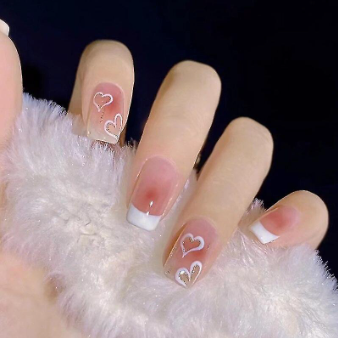
In the Know - Do you know how to apply false nails?
Share
Welcome Back!
We all know the troubles with applying False Nails - The pinging off, not sitting correctly, the wrong sizes, the glue. I've been there many a time when i'm unable to get the beauty salon and get my talons done and turned to stick ons.
Today we are going through a step by step guide so you can relax and not worry about needing to carry the glue or spares.

Essentials on getting started -
- Stick-on False Nails:
You can purchase these at most stores especially the likes of Asda, Tesco, Superdrug, Boots & More. They come in a range of different shapes and designs. - Nail File:
You'll need this to shape your natural nail and also gently roughen the surface if the nail bed for better adhesion. - Nail Glue or Adhesive Tabs:
So the choice is yours, However most kits now come with glue included. Personally i always buy nail glue separate. You can always buy the tabs and the glue separate. - Nail Buffer:
A nail buffer can help smooth the surface of your nails. - Cotton Balls and Nail Polish Remover:
These are useful for cleaning your nails before application. - Cuticle Pusher:
This is optional, but it can help push back your cuticles for a neater application.
Now we have what we need to get started - Let's Go!
Step 1 - Preparing your natural nails
- Remove any existing nail polish
- Use the nail file to shape your nails to the desired length and shape
- Gently buff the surface of your nails, Helps remove any natural oils - Better surface for the nails to adhere to.
Step 2 - Cleaning your nails
- Use a cotton ball soaked in nail polish
- Wipe it across each nail to ensure they are clean and oil-free
Step 3 - Selecting the nails
- Select your nails that are best fit your natural nails.
- Lay them out in the order you plan to apply them.
Step 4 - Applying the Adhesive
- Tabs peel the backing off and apply them to your natural nails
- Glue apply a small drop to your natural nails.
Step 5 - Attaching the Nails
- Carefully press the stick-on nail onto your natural nail.
- Starting from the cuticle and pressing down towards the tip.
- Ensure it's aligned with your cuticle and centred on the nail.
- Hold it on place for 5-10 seconds to allow it to adhere.
Step 6 - Repeat Steps 4&5
- Continue the process on each of the nails.
Step 7 - Filing and Shaping
- Once all nails have been adhered get your nail file
- Use the nail file to shape and smooth the edges
- Use the file in one direction to avoid damage the nails.
Step 8 - Finishing Touches
- Apply a clear topcoat to seal the edges
- Give more natural look and lasts longer.

Here's some tips and tricks
- If the nail doesn't fit well, you can gently file and trim them for a better fit.
- Avoid getting your stick-on nails wet for at least an hour after application to allow the adhesive to fully bond.
- Be gentle with your hands for the first few hours after application to avoid accidental damage.
- Stick-on nails are temporary and can typically be removed by soaking them in warm, soapy water or using acetone-based nail polish remover.
Following the above steps will help give you the makeover you need.
We have both nails and nail glue in stock!!
Visit out Nails Section to have a look around.


